The In-page and Pop-up window tab lets you customise the In-page and Pop-up window widgets configuration that will be loaded into your web page and personal upload widget. Customising the upload widget lets you match your company's theme, color, branding, and feel of your Digital Pigeon's upload form on your web page. This increases trust from your customers and makes a seamless experience when using the upload widget.
The In-page and Pop-up window tabs have almost identical configuration procedure except for the Preview sections. To switch between the two (2) tabs, click the corresponding tab to access and configure its settings.
The website and personal upload widget's In-page/Pop-up window tab is consist of five (5) sections namely:
These sections work hand in hand to help you produces the website upload widget configuration that you desired.
Widget Options
The Widget Options section helps you design the desired looks and feel of the upload widget. The options let you customise the color scheme, colors, field names (labels), and placeholders. The Widget options include the following configuration: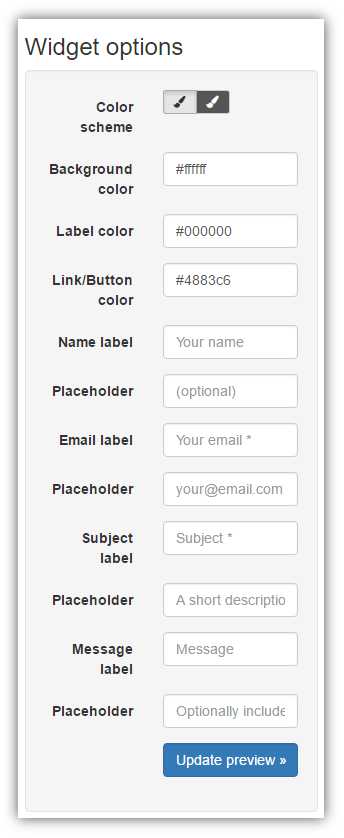
- Color scheme: this button lets you select the widget's color scheme from light to dark.
- Background color: this field lets you select the widget's background color. Clicking the field will activate the color selection box where you can select the preferred background color.
- Label color: this field lets you select the link and button color of your widget. This is applied in the Add Files links and the Start Upload button. Clicking the field will activate the color selection box where you can select the preferred link and button color.
- Name label: this field lets you change the name label to what you want to appear.
- Placeholder: this placeholder is for the Name label field. It suggests what to enter into the Name label field.
- Email label: this field lets you change the email label to what you want it to appear.
- Placeholder: this placeholder is for the Email label field. It suggests what to enter into the Email label field.
- Subject label: this field lets you change the Subject label field to what you want it to appear.
- Placeholder: this placeholder is for the Subject label field. it suggests what to enter into the Subject label field.
- Message label: this field lets you change the Massage label field to what you want it to appear.
- Placeholder: this placeholder is for the Message label field. It suggests what to enter into the Message label field.
After defining the Widget options section, click the Update preview>> button to generate a preview in the Preview section. When changes are applied to the Widget options section, you must click the Update preview>> button to update the Preview section.
Preview
The Preview section lets you view the configured website upload widget. The generated preview reflects the Widget options' configuration. This section shows you what you created and what you need to update to achieve the desired upload form design.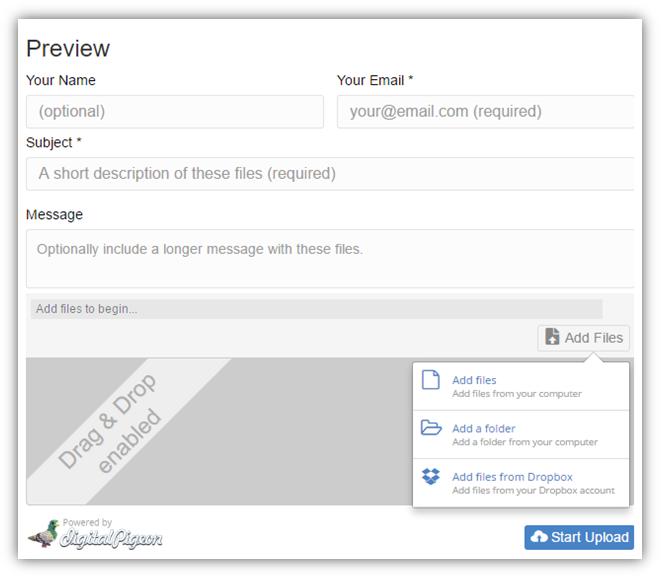
It is important to note that the Pop-up window tab's Preview section differs with In-page tab. You are required to click the Send us files link to view the generated preview.
Integration Options
The Integration options section lets you integrate URL redirection and Javascript event calling when the upload is completed.
To redirect to a different page after uploading the files, use the Redirect URL field by entering the URL of the page where you want to redirect the user.
The Javascript Event option adds Javascript event calling when the upload completes. To enable this option, select the Javascript Event checkbox.
Widget Code
The Widget Code section generates the widget code of your configuration. Copy the code from the field and paste it into the HTML of your website.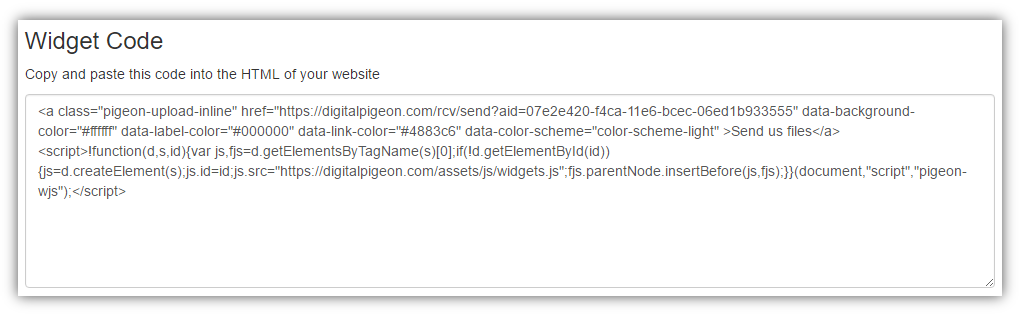
Advanced Options
The Advanced Options section provides you additional options that you can add after generating your Widget Code. There are two (2) advanced options that you can add: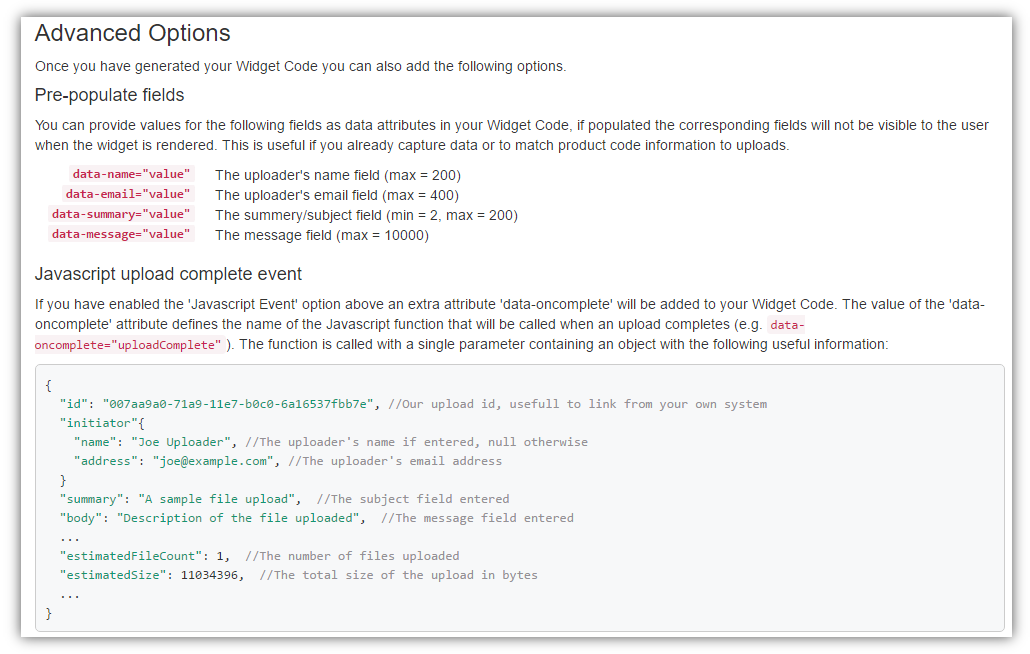
- Pre-populate fields: you can add values for the fields stated as data attributes in your Widget Code. These fields will not be visible to the users when the widget is rendered. This is handy if you already caputred the data or to match product code information to uploads.
- Javascript upload complete event: a prerequisite of this option is the Javascript Event option under the Integration Options section. An extra attribute "data-oncomplete" will be added to your Widget Code. The value of the "data-oncomplete" attribute defines the name of the Javascript function that will be called when an upload completes.
Comments
0 comments
Please sign in to leave a comment.