User Roles
Customising your brand requires specific roles or credentials to access this feature. You need to have an Admin or an Owner credentials to update the profile branding or the look and feel of your profile.
Branding your Digital Pigeon Account
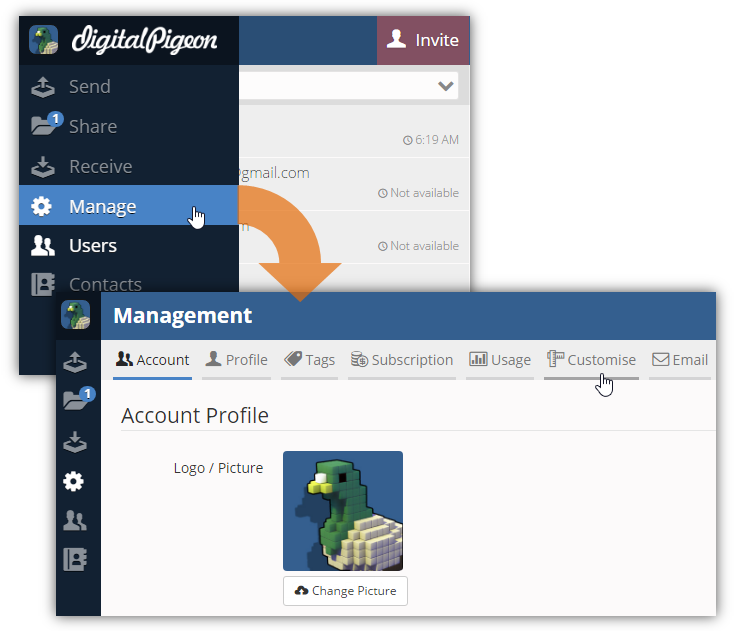
Open the Manage module on the Sidebar and select the Customise tab. This tab lets you add your own branding.
For first time users, the Customise tab displays the Start Appearance Editor button. Click this button to start branding your Digital Pigeon account.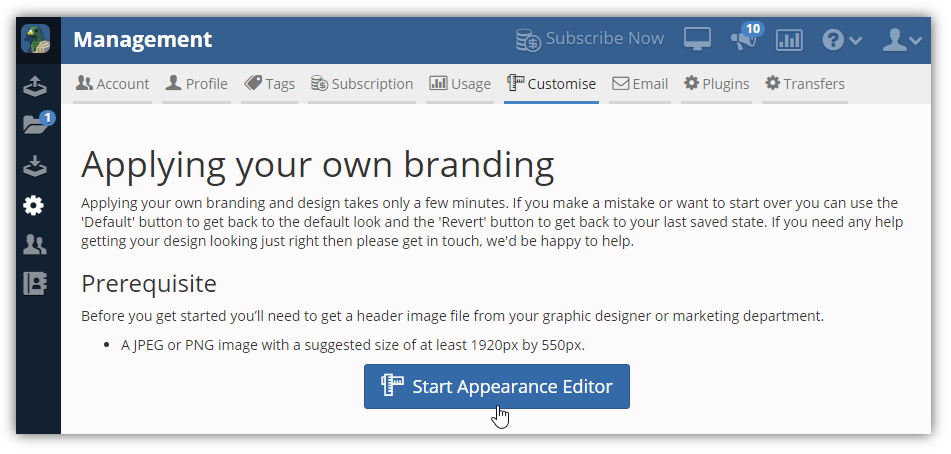
You will be directed to the Edit Design page where you can customise the appearance of the uploaded files.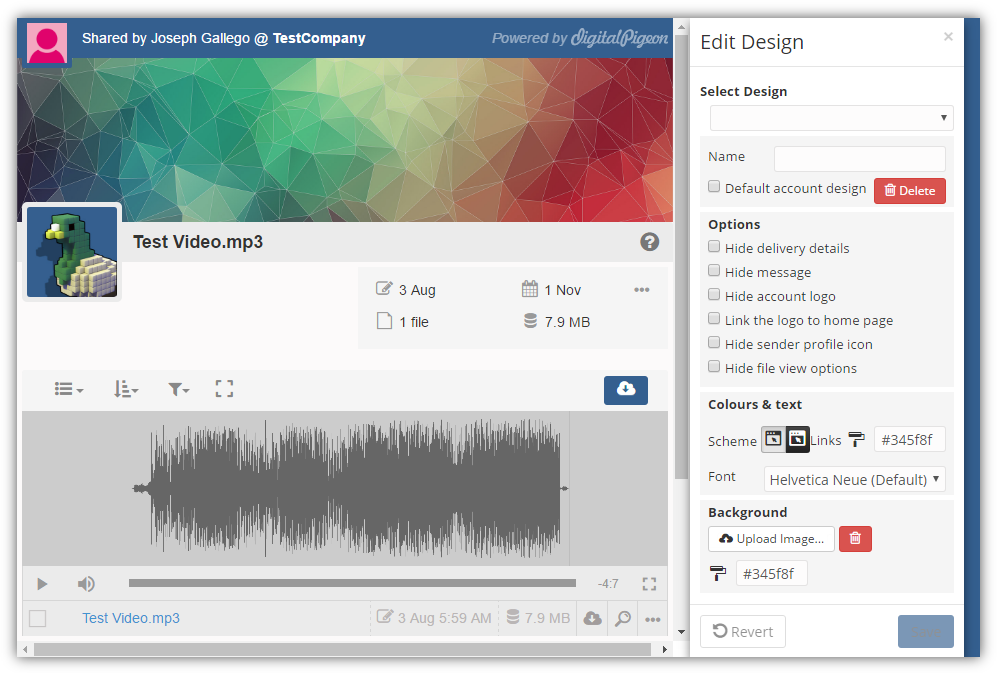
Customising your Digital Pigeon Design
The Edit Design panel is located on the right side of the screen. The Edit Design panel is divided into four (4) page customising sections:
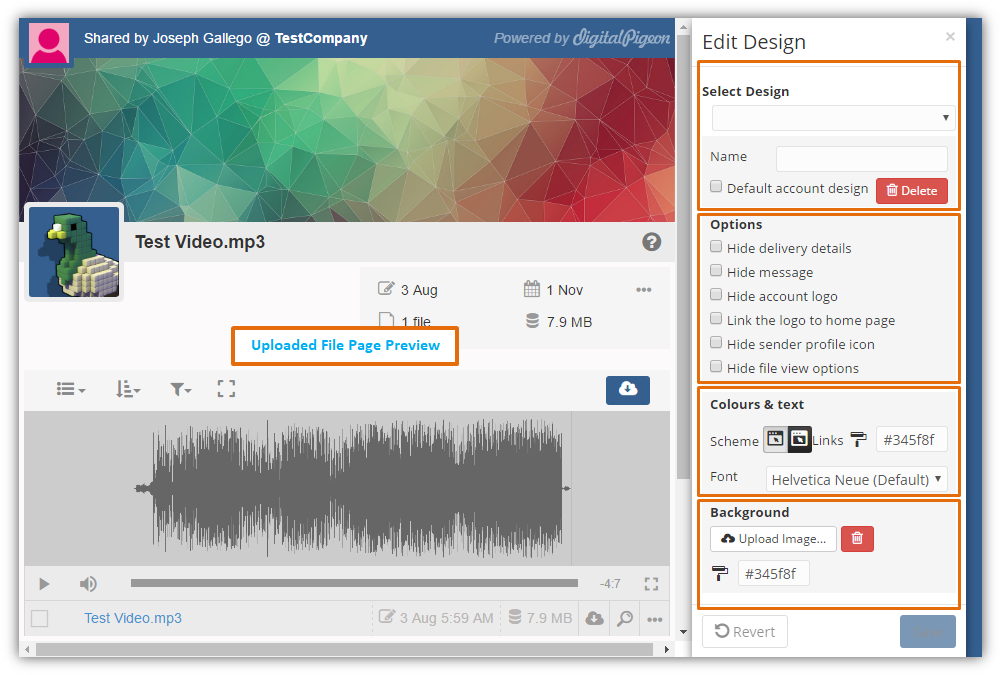
The panel on left side of the page is the Uploaded File Page Preview. This panel displays the settings that you configured from the Edit Design panel (right panel).
The displayed changes will not be applied unless you click the Save button. If you do not want to apply the changes after configuring the settings, you can click the enabled Revert button and all changes will be reverted back.
Select Design
The Select Design drop down menu provides you design options. In this section, you can use the Name field to label your custom design.
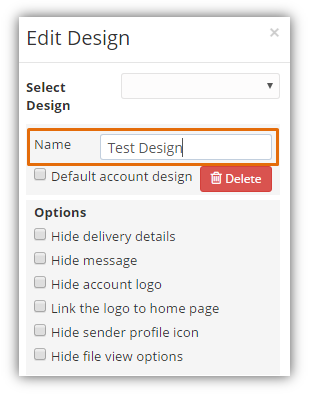
If you have previously saved custom designs, you can find them in the Designs Menu by clicking the drop down arrow. Set your default design within this panel. In the Select Design drop down menu, choose the preferred design and click the Default account design checkbox.
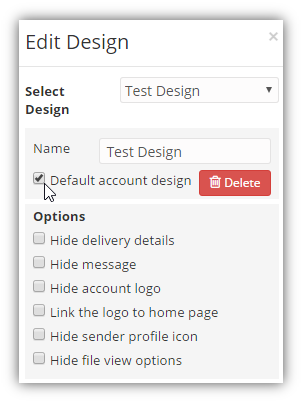
This panel will set the default design that will be used for uploads that don’t specifically set a design for an upload. [Link to Account Settings Guide]
Lastly, admins can change the default design affecting all uploads that are utilising it. For all users, override the Default Design by updating the user profile under the Manage Module’s Profile Tab and change Default Page Design field. See Setting Default Page Design.
Options
The Options section enables you to add/remove options to the Upload page. In this section, you can:
- Hide delivery details
- Hide message
- Hide account logo
- Link the logo to home page
- Hide sender profile icon
- Hide file view options
Simply select the checkbox to add or remove the desired options. Each option can be added or removed manually. The list below provides an overview of its functions:
Hide Delivery Details
The Delivery Details option provides you with a glimpse of the uploaded file as it includes the file(s) basic details such as the creation date, expiration date, number of files, total file size, file server region, feedback, and virus scan.
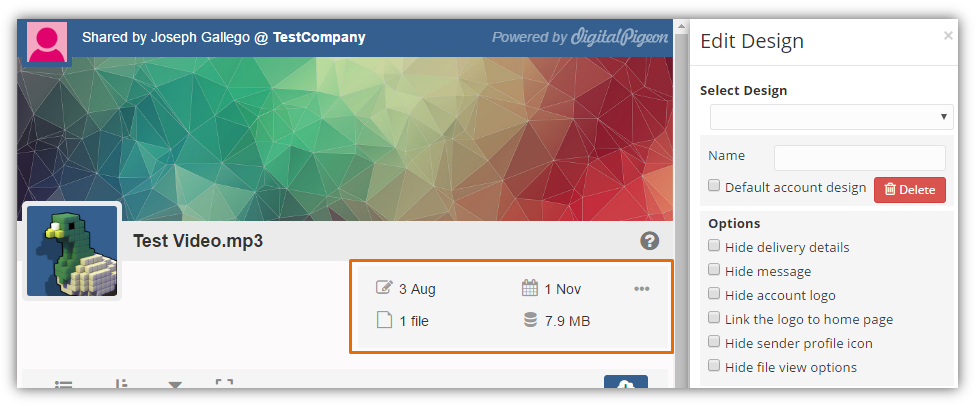
By default, this option is enabled. Selecting the Hide delivery details checkbox will disable this option and hides the Delivery Details as shown below.
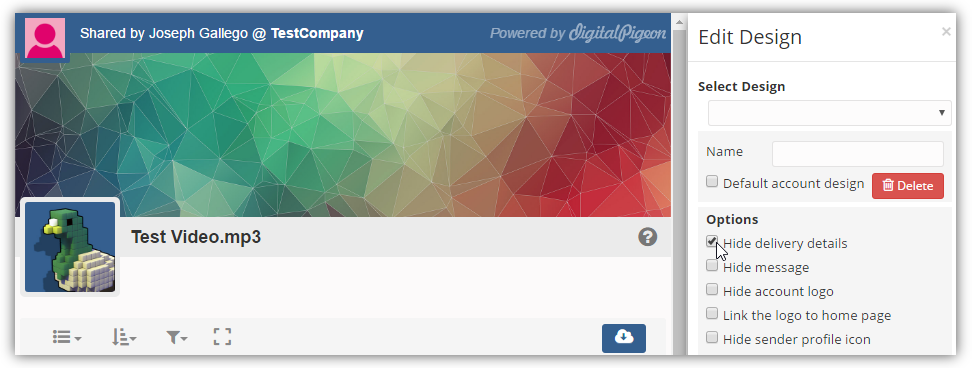
Hide Message
The Message option displays a short description or the message you indicated when creating a new send/share. This is displayed below the subject of the send/share file.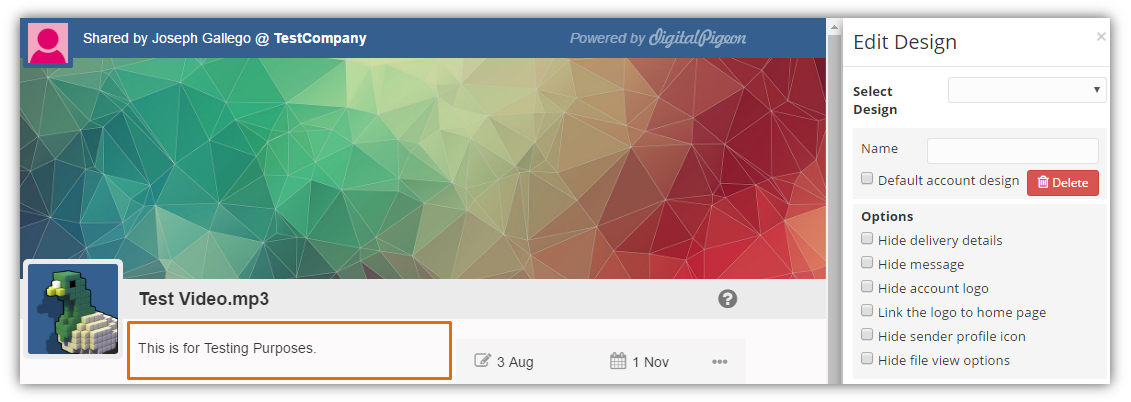
By default, this option is enabled. Selecting the Hide message checkbox will disable this option and hides the message as shown below.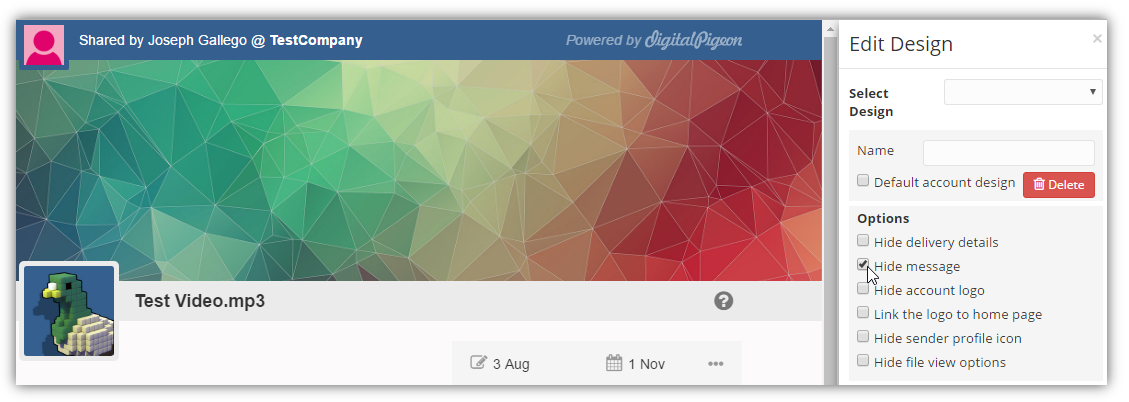
Hide Account Logo
The Account Logo is your trademark, clients know who’s sending or sharing files by looking at it. Adding a logo to your company profile is one of the best branding strategies as people recognize your organization by looking at it. To add a logo, you can go to the Manage Module and open the Profile tab. Add or change the logo by updating the Picture using the Change Picture button.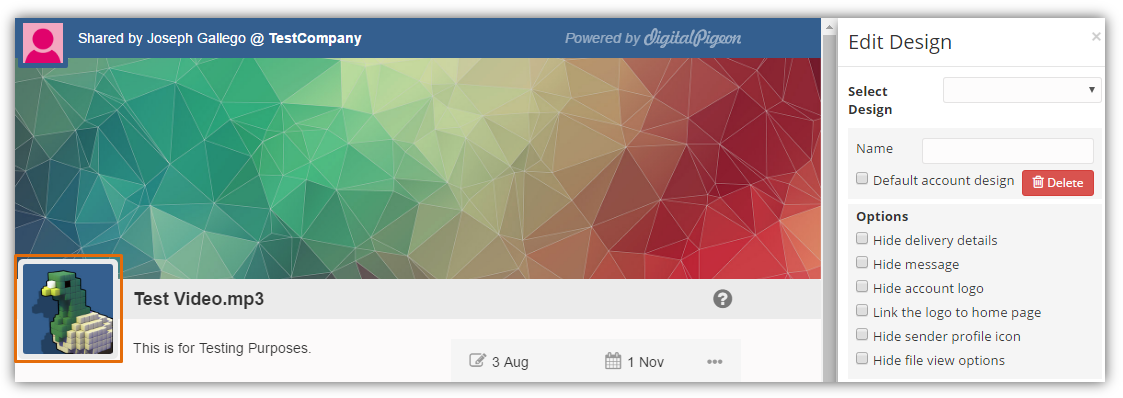
By default, this option is enabled. Selecting the Hide account logo checkbox will disable this option and hides the account/profile logo.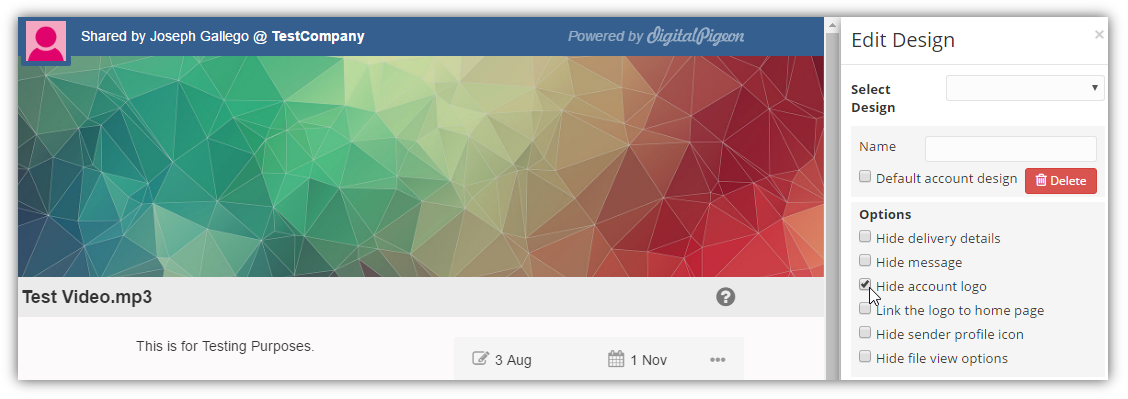
Link the Logo to Home Page
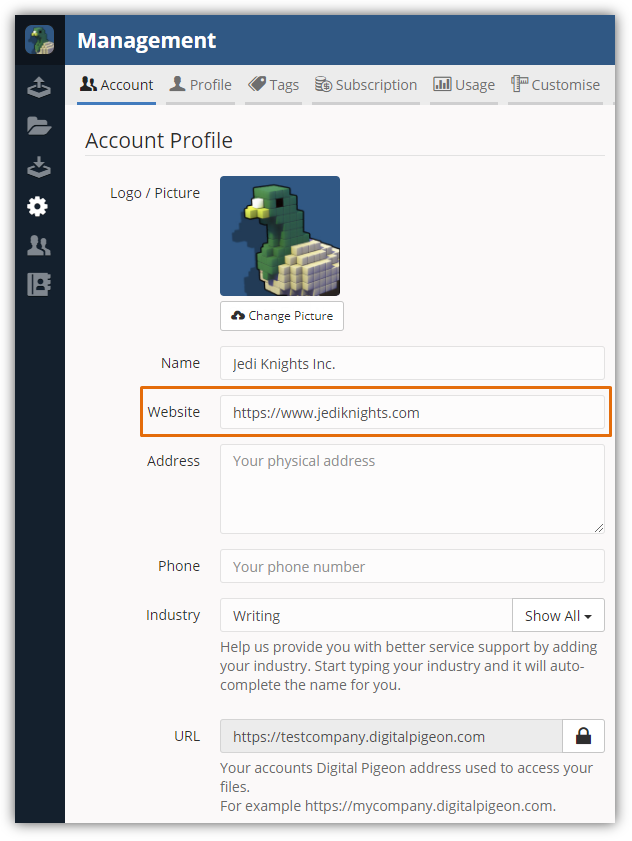
Accounts with specified websites in the Manage > Accounts > Website enables you to link the Logo in the File Delivery page to your website. Ensure to enter your company's website in this field to make the Link the Logo to Home Page works.
Selecting the Link the Logo to Home Page checkbox will enable this option.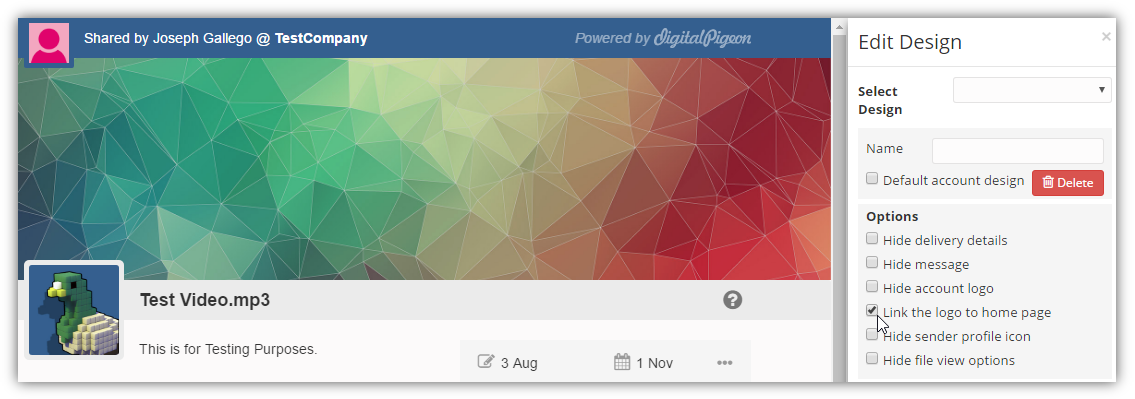
Hide Sender Profile Icon
The Sender Profile Icon is displayed in the upper left part of the screen. This icon shows the sender’s profile logo. It adds sender recognition when enabled as recipients can easily see this feature.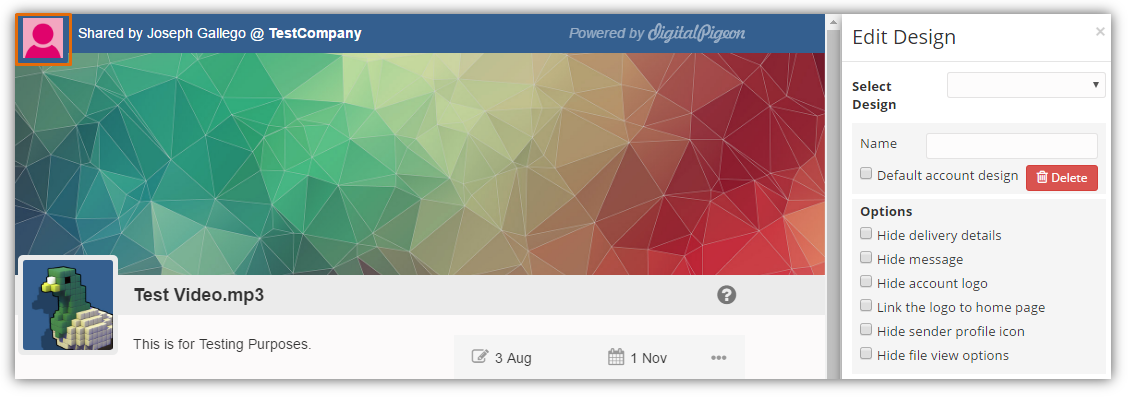
By default, this option is enabled. Selecting the Hide sender profile icon checkbox will disable this option and hides the sender profile icon.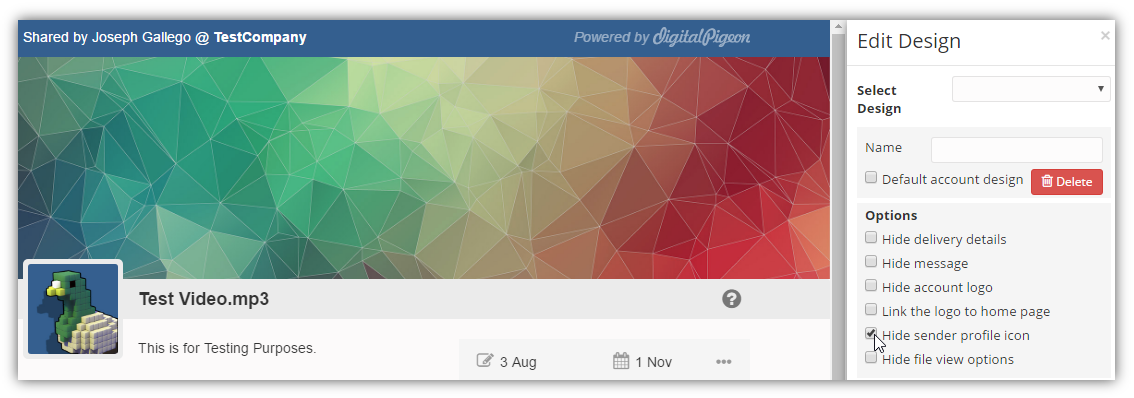
The Profile Picture can be added to the Manage Module’s Profile tab for all users. Use the Change Picture button to add profile photos.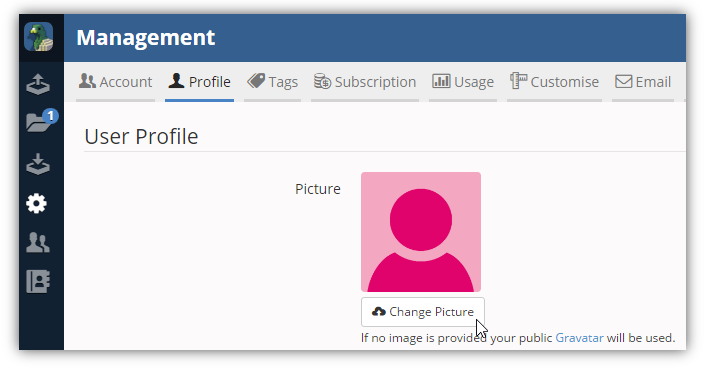
For Admins, set other users Profile Pictures, by going to the Users Modules and select a specific user to update. After selecting the user, update the User Profile Picture using the Change Picture button. See [Profile Picture Guide].
Hide File View Options
The File View Options contains file view options (e.g. list, contact sheets, previews,gallery and audio playlist), file order, filter, and full screen view. This option enables you to personalise the file view according to your preference.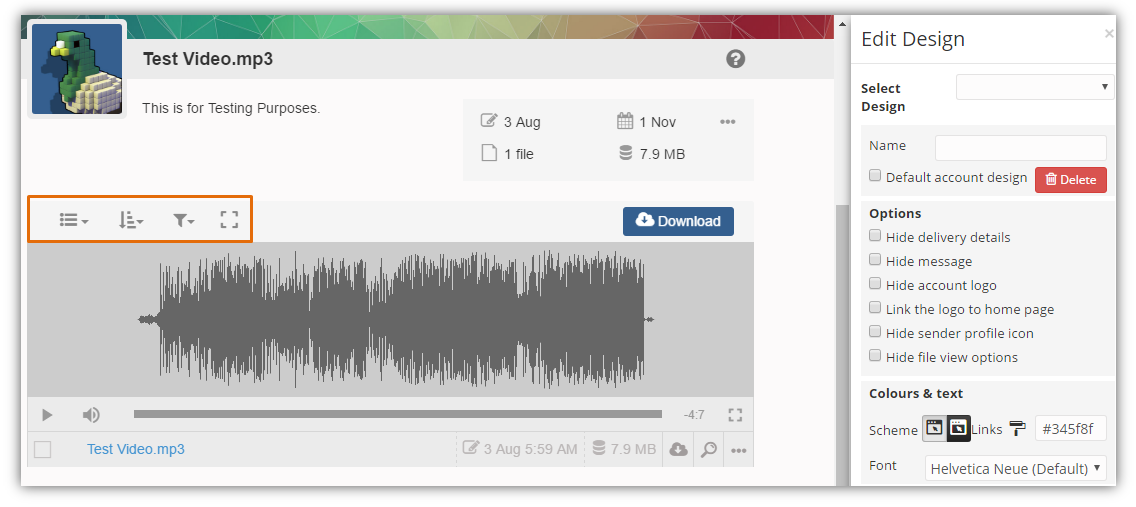
By default, this option is enabled. Selecting the Hide file view options checkbox will disable this option and hides the File View Options feature. Disabling this option will prevent the recipient from switching how the files are being viewed.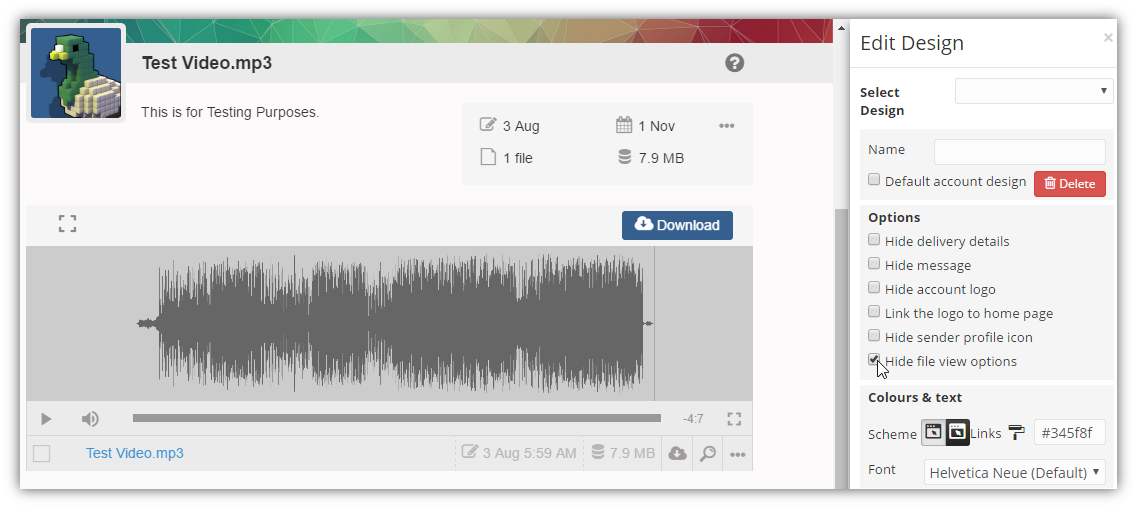
Colours and Text
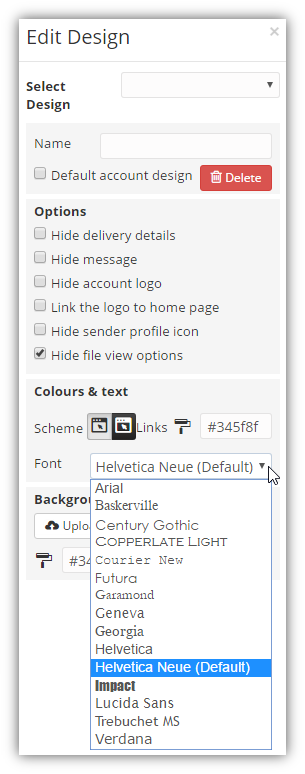
The Colours and text section lets you customise the upload page’s colour scheme, links colour, and font selection.
In this section, you can change the page’s colour scheme from lighter to darker by selecting your preference in the Scheme field.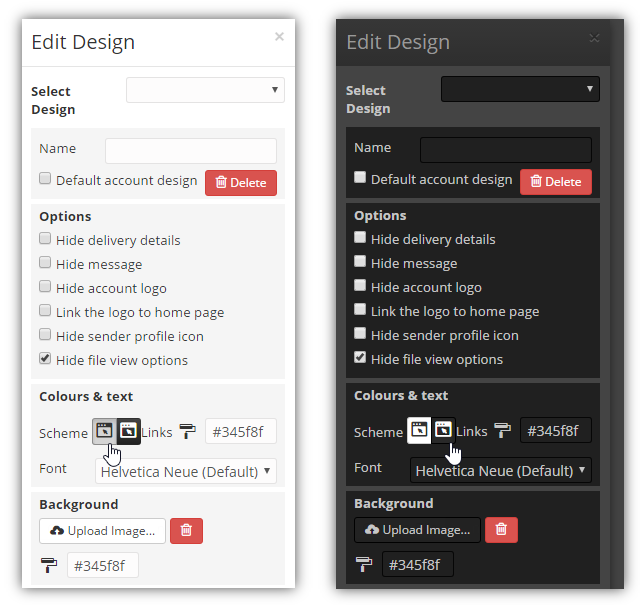
Change the link colours by clicking the Links field to activate the colour selection menu.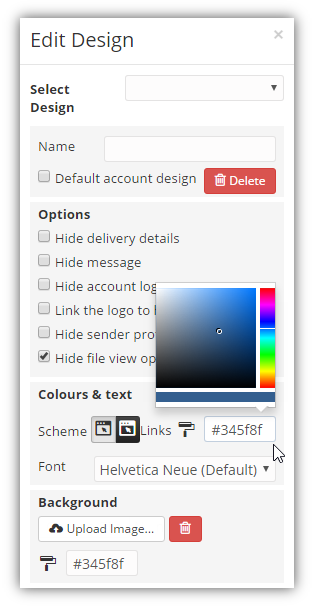
To change the page’s fonts, find and click the Font field to enable Font sub-menu. Select the preferred font to continue.
Background
The Background section enables you to add background images to the upload page. On the Edit Design panel, locate the Background section and click Upload Image field.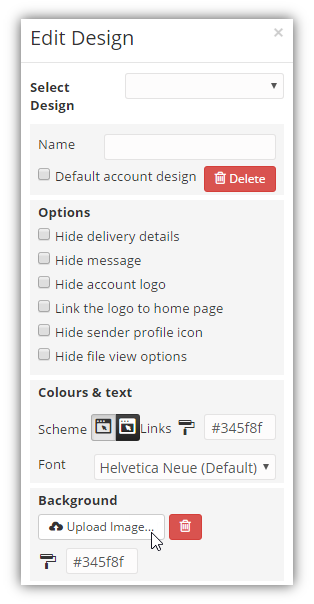
Note: to delete the background image, click the Delete button beside the field.
The File Location window will appear. In this window, you can select and upload the background image.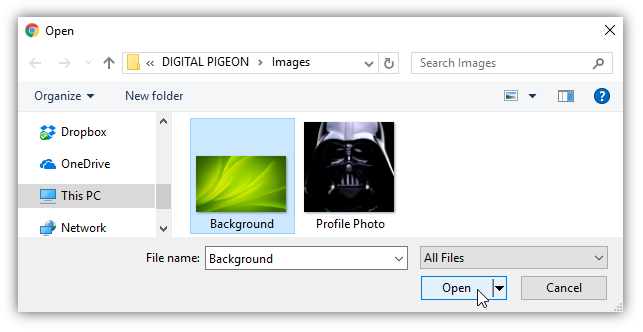
After uploading the background image, the Crop the image window will appear. Here, crop the image that will be used as your background. Click Use to utilise the cropped image.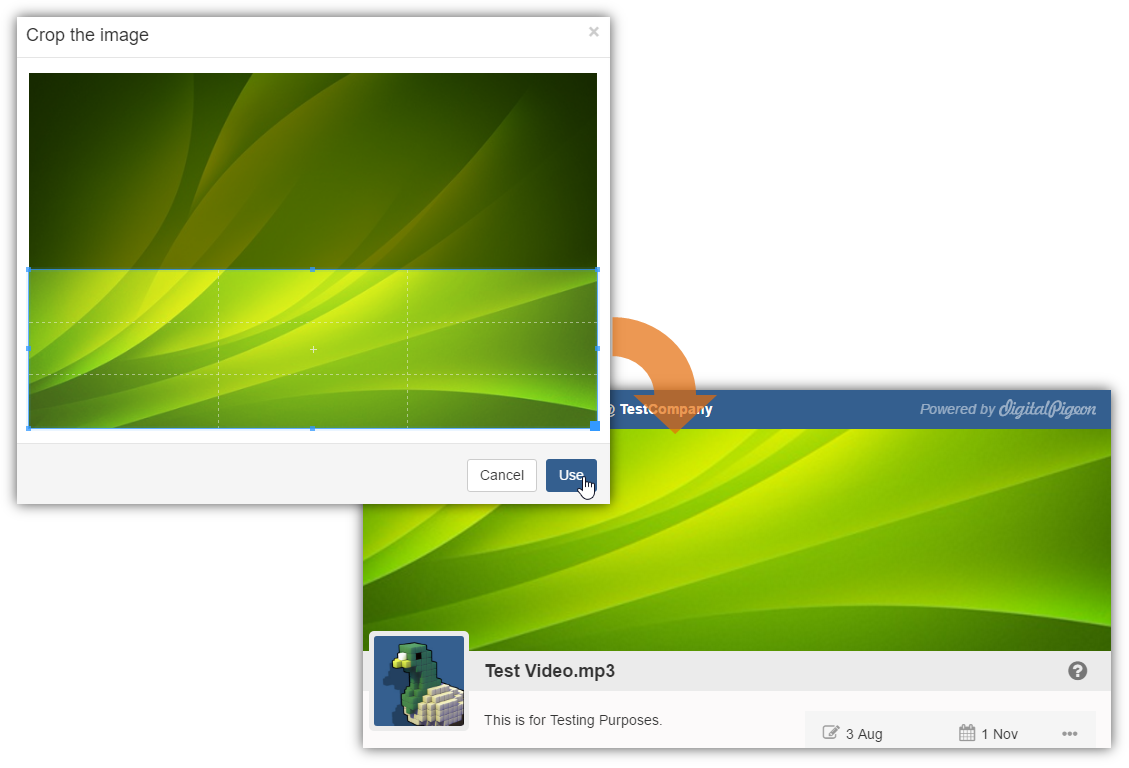
Change the background colour by clicking the Background Colour field to activate the colour selection menu.

The Colour selection box will expand. Choose the preferred background colour from the selection box. The Preview page will display the changes as you select from the selection box. Make these changes permanent by saving the updated configuration.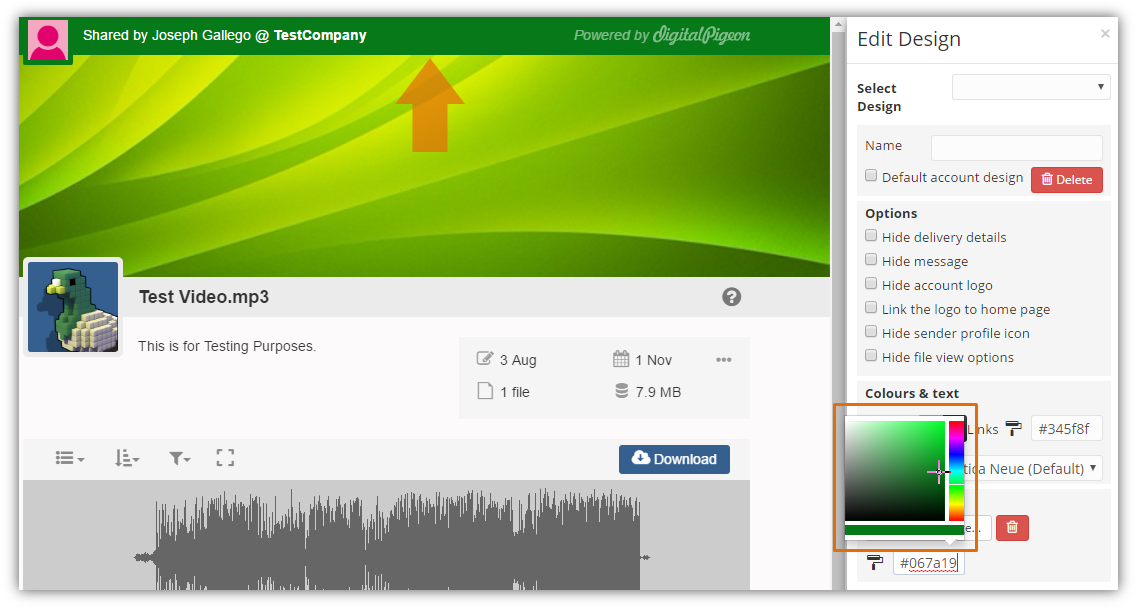
Saving/Reverting Designs
Ensure to review your design before saving it. After thoroughly reviewing your design, scroll down and click the Save Button.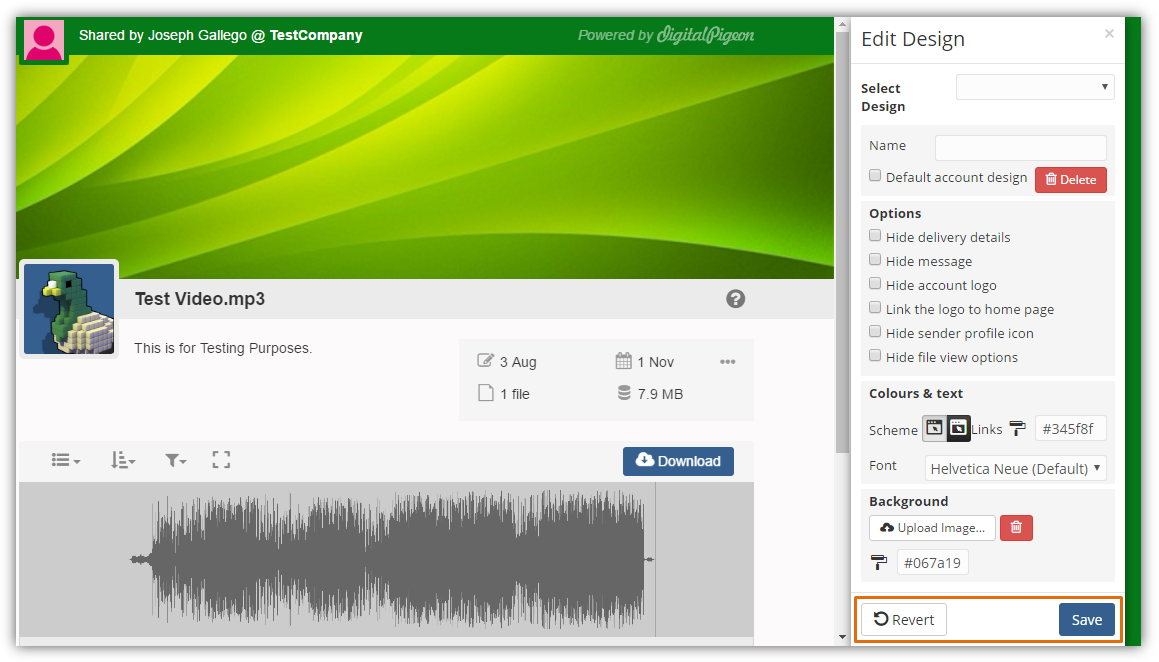
To revert any changes from your design, scroll down and click the Revert button. This will remove any changes and will not save your custom design.
Saved designs will appear in the Select Design section. You can choose saved designs from the list. See Select Design.
Setting Default Page Design
When setting the Default Page design, it is important to note that only users with Admin credentials can set the Account Default. The selected default page design will be used by all users in the account. This configuration must be saved first before it becomes permanent.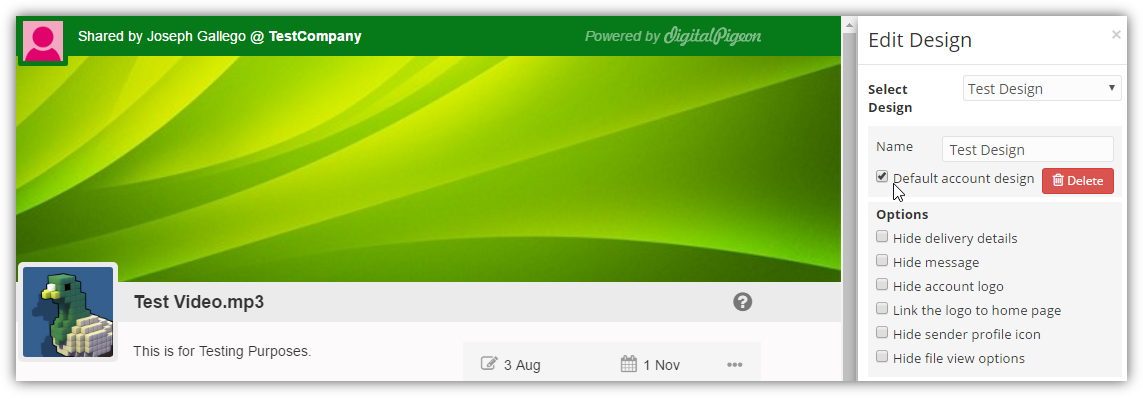
All other users have the ability to configure their own default page designs without affecting the Account’s default page design. Override the Account Default by following the instructions below. Configure your page design to enhance recipient’s engagement and experience when receiving your uploaded files.
Open the Manage module on the Sidebar and select the Profile tab. This tab lets you update your profile and configure notification settings.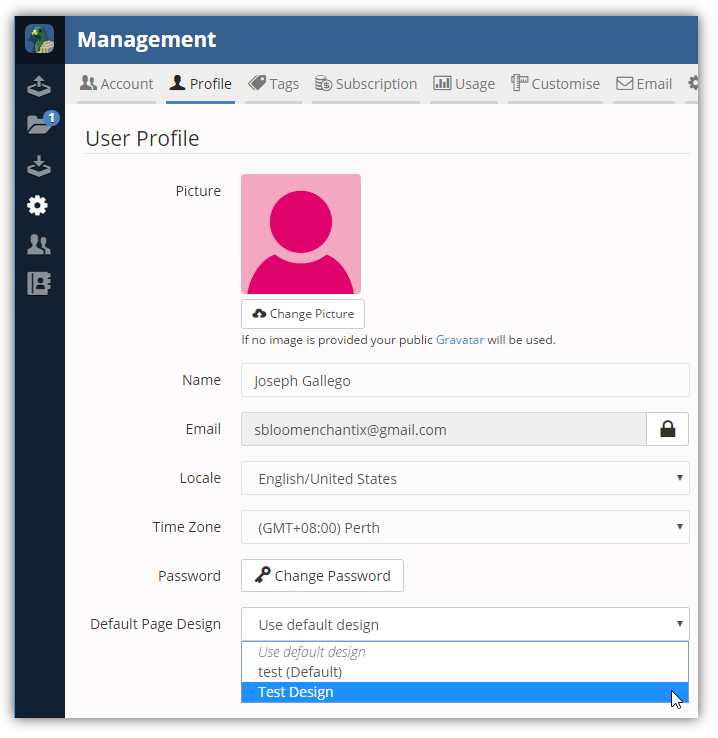
In the User Profile section, find the Default Page Design and click its drop down arrow. Select the preferred default page design.
Review the changes before saving and click Save Changes to apply and save the changes.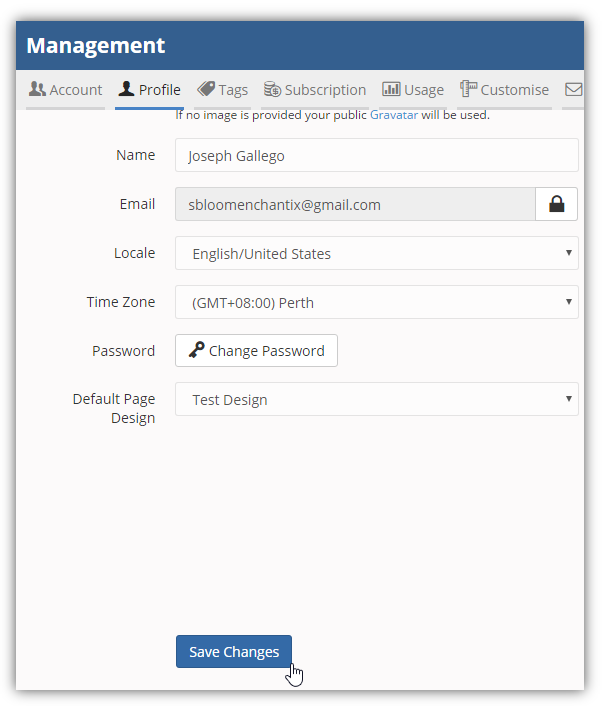
Watch our short tutorial video for further guidance.

Comments
0 comments
Please sign in to leave a comment.