Third party sender is defined as non-Digital Pigeon user who sends you files. Since receiving files in Digital Pigeon is different from the conventional email attachments, we developed a unique method to enable you to receive files from non-Digital Pigeon users.
The Receive Files Link allows you to receive files from them through links they can use to send the files to you or by embedding these links to your website as widgets (see Receive Links Dashboard). Below are two (2) different methods to use the receive file links:
- Method 1: Using the Existing Account Receive Files Link
- Method 2: Creating a Personal Receive Files Link
Method 1 Using the Existing Account Receive Files Link (Default)
This method is best used when you work with teams or when multiple users are managing the account. By default, when the account is created, the Account Receive Files Link is generated. This link is pre-configured in which files received from this link are accessible to authorised users that are associated with the account.
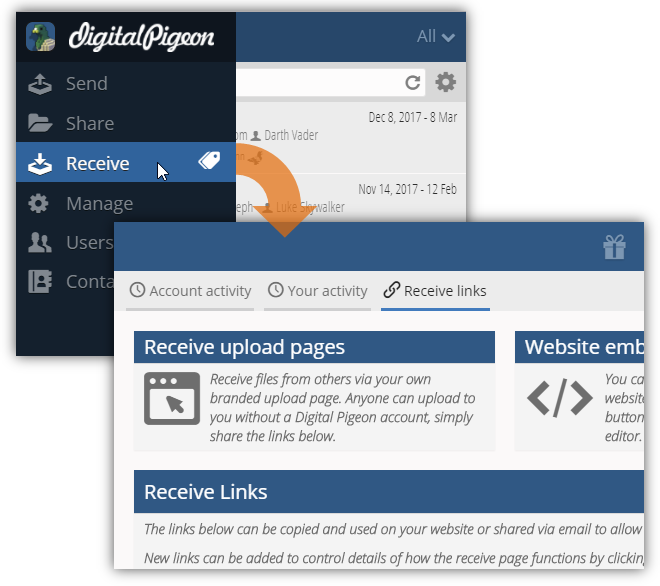
- On the Sidebar Menu, click Receive to open the Receive feature. By default, the Receive Links Dashboard is active when accessing the Receive feature.
- Note: if the Receive Links Dashboard (tab) is not active, click the Receive links tab to open.
- Note: if the Receive Links Dashboard (tab) is not active, click the Receive links tab to open.
- Find the Receive Links panel and use the Account Receive Files Link. This is a unique link that comes with your account. You can embed this into your website or share it via email to receive files from third-party senders.
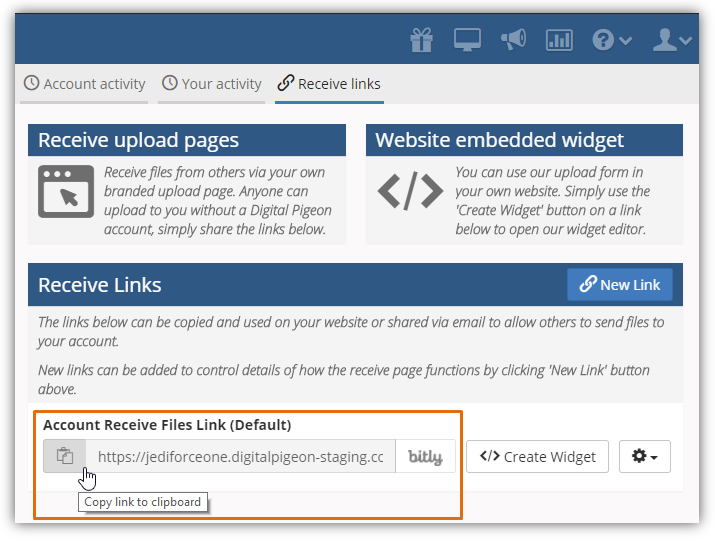
Received files from this link are accessible by all users that are associated with the account. This is suitable for projects or tasks that involve other team members. However, if you prefer to receive files that only you can access, see Method 2.
Method 2 Creating a Personal Receive Files Link
This method is best used for private and personal files which can only be accessed by you. You can do this by creating a dedicated link and configuring it to match your desired settings.
- On the Sidebar Menu, click Receive to open the Receive feature. By default, the Receive Links Dashboard is active when accessing the Receive feature.
- Note: if the Receive Links Dashboard (tab) is not active, click the Receive links tab to open.
- Note: if the Receive Links Dashboard (tab) is not active, click the Receive links tab to open.
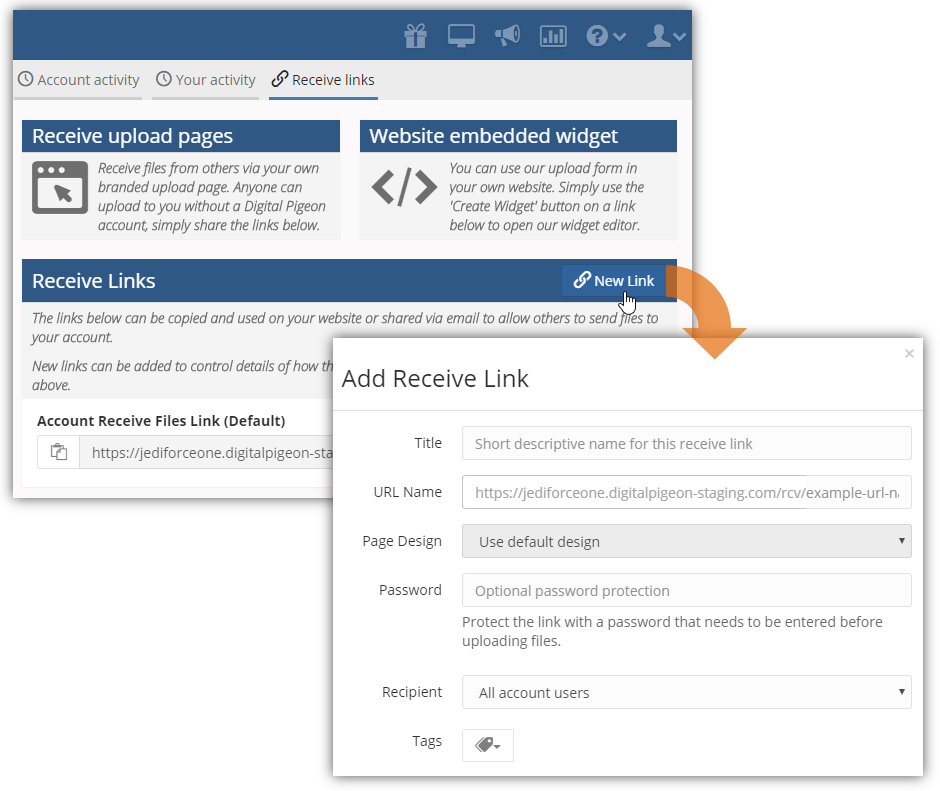
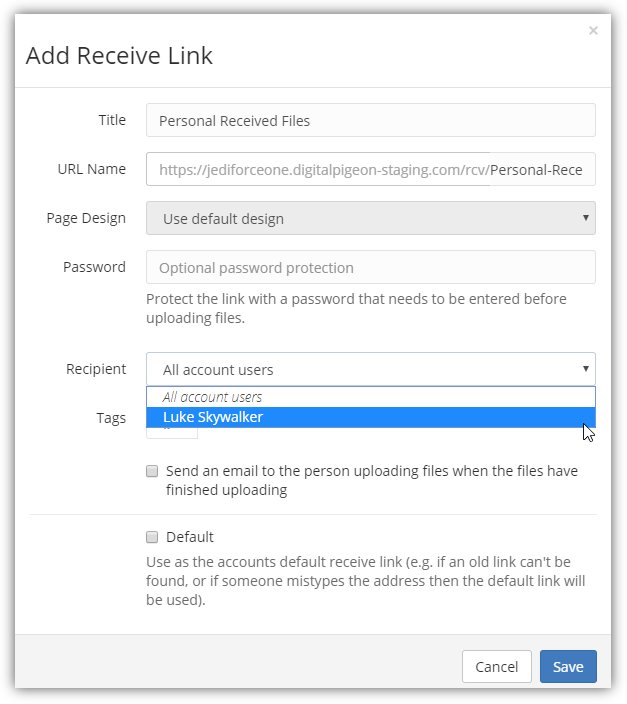
- Find the Receive Links panel and click New Link to create a new receive link. This opens the Add Receive Link window wherein you can specify the link details and configure its settings. See Create/Edit Receive Links.
- Configure the link's settings (See Receive Link Configuration) but ensure to specifically change the Recipient field to yourself. To do this, find and click the Recipient field's drop down arrow and select your Name and continue with the rest of the configuration.
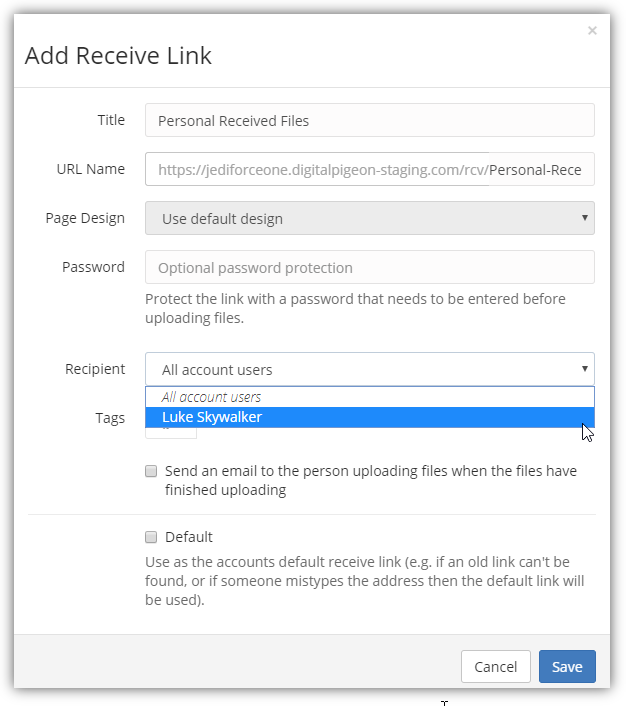
- Review the receive link details and configuration before saving. Once everything is set, click Save to create the new Receive Files Link.
Comments
0 comments
Please sign in to leave a comment.