Overview
Contact Groups enables you to organise, classify or categorise contacts that have similar functions (e.g. Admins, Creative Team, Quality Teams, etc.). In this section of the documentation, you will learn how to manage the contact groups which includes:
- Creating Contact Groups
- Adding Contacts to Contact Groups
- Adding Multiple Contacts to a Contact Group
Create Contact Groups
In this article, you will learn how to create a contact group. Each group has the specific distinction as its details cannot be duplicated (i.e. group name, colour, description).
- On the Sidebar Menu, click Contacts to open the Address Book page.
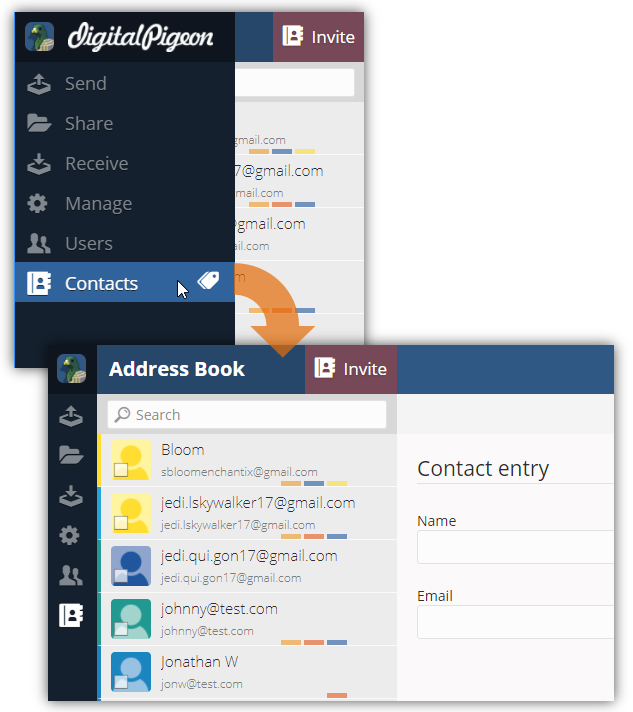
- Find and click the Contact Group menu, when it expands, click New. This opens the Contacts - Add Tag window. In this window, you can specify the contact group's details.
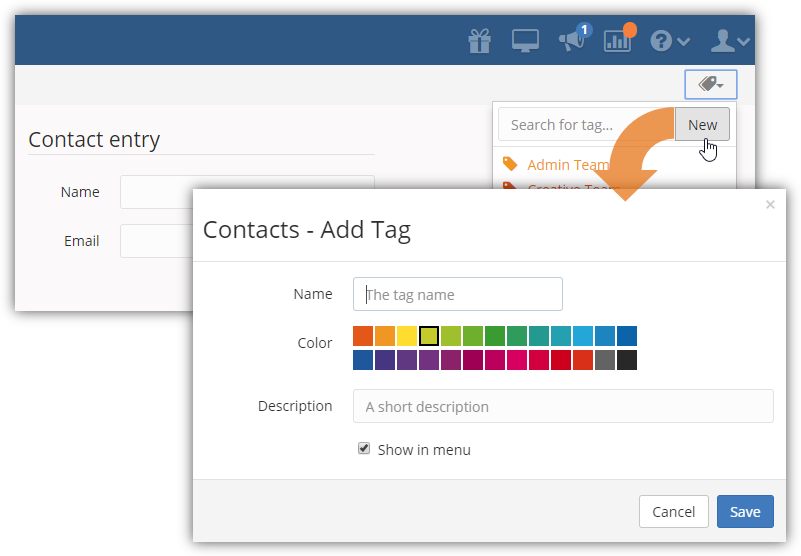
- Specify the contact group's details:
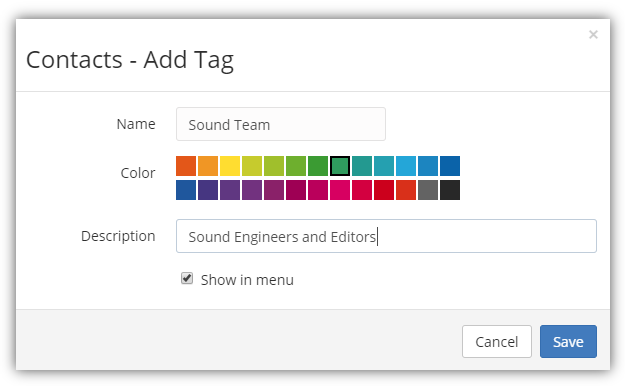
- Name: enter the group name (e.g. Admin, Creative Team, Quality Team, etc.).
- Color: select the group colour, assigning a group colour enables you to identify group easily.
- Description: enter a brief description of the group.
- Show in menu: when enabled, the group will appear in the Sidebar menu's Contacts feature.
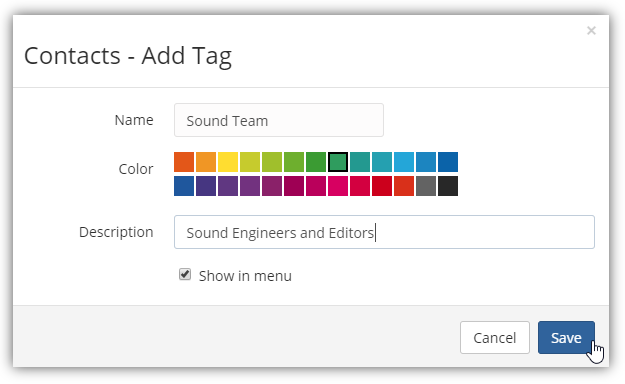
- Click Save to continue creating the contact group.
Adding Contacts to Contact Groups
After creating contact groups, it is time to add members to it. There are two (2) ways to add contacts to a group. Each method is demonstrated below:
Method 1
The first method lets you add contacts to a group when you selected a contact for viewing or editing.
- On the Sidebar Menu, click Contacts to open the Address Book page.

- In the Contacts list, find and click the contact that you want to edit/update.
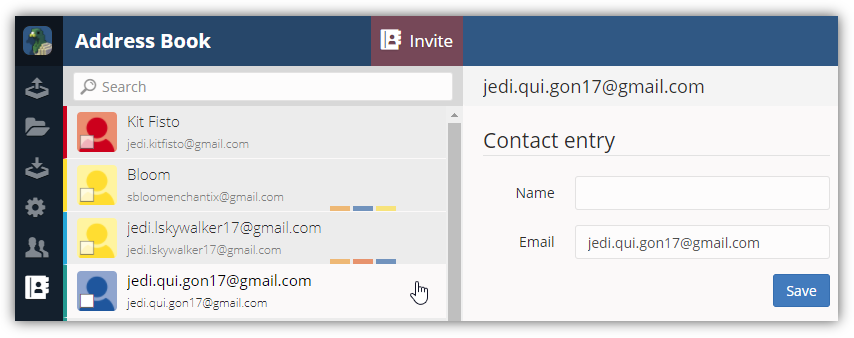
- Note: use the Search field to search for the contact by entering the contact name.
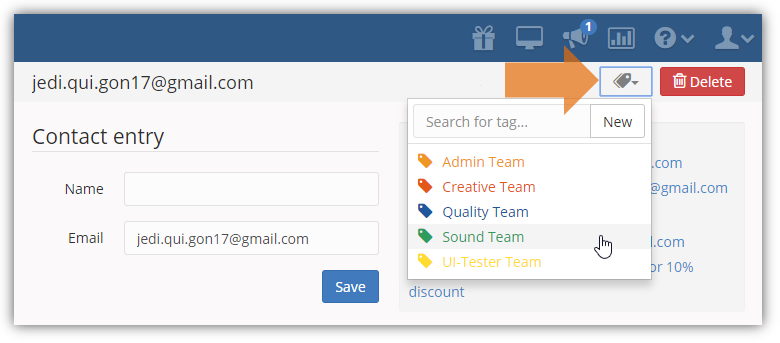
- After selecting the contact, the Contact entry page opens. In this page, you can update the contact details, manage contact groups, view contact activities, apply contact actions or delete the selected contact.
- Find and click the Contact Group menu, when it expands, select the group where you want to assign the selected contact.
Method 2
The second method lets you add contacts to a group by selecting its checkbox from the contact list and using the group tagging icon above the list.
- On the Sidebar Menu, click Contacts to open the Address Book page.

- In the Contacts list, click the Checkbox of the contact that you want to add to a group.
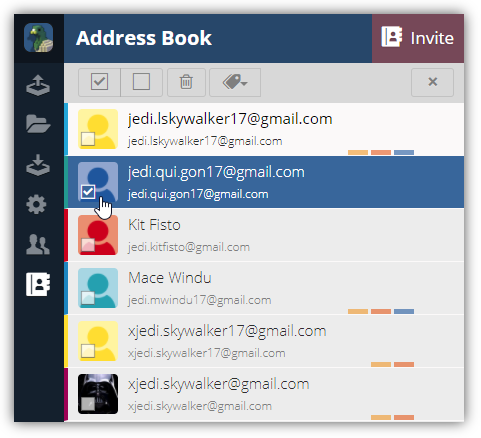
- Note: search contact(s) using the Search field. Enter the contact name to initiate search.
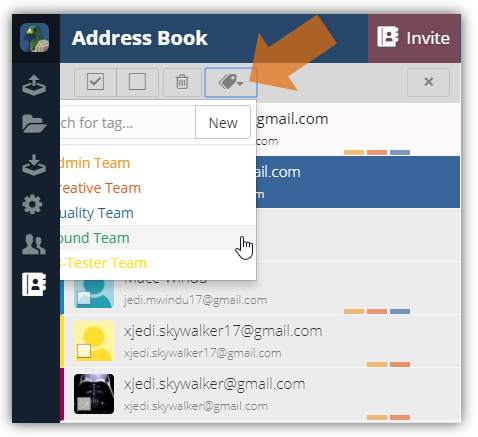
- A set of options will be activated above the Contacts list. Click the Contact Group menu and select the group where you want to assign the selected contact.
Adding Multiple Contacts to a Contact Group
Adding multiple contacts to a group is another option when you have to add more contacts to a group. Build a group with multiple contacts using this method.
- On the Sidebar Menu, click Contacts to open the Address Book page.

- In the Contacts list, click the Checkbox of each contact to select multiple items.
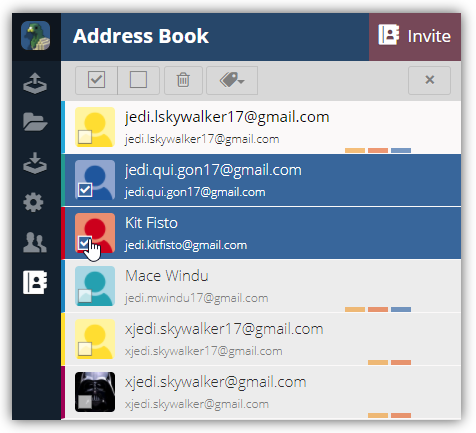
- Note: search contact(s) using the Search field. Enter the contact name to initiate search.
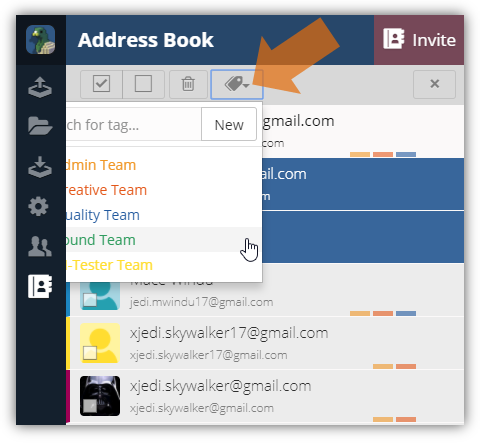
- A set of options will be activated above the Contacts list. Click the Contact Group menu and select the group where you want to assign the selected contact.

Comments
0 comments
Please sign in to leave a comment.