Upload tags or General tags are used for sent, shared and received files tagging. The tags enable you to categorise and organise files so you can access them with ease. In this article, you will learn how to manage the upload tags.
Create New Upload Tags
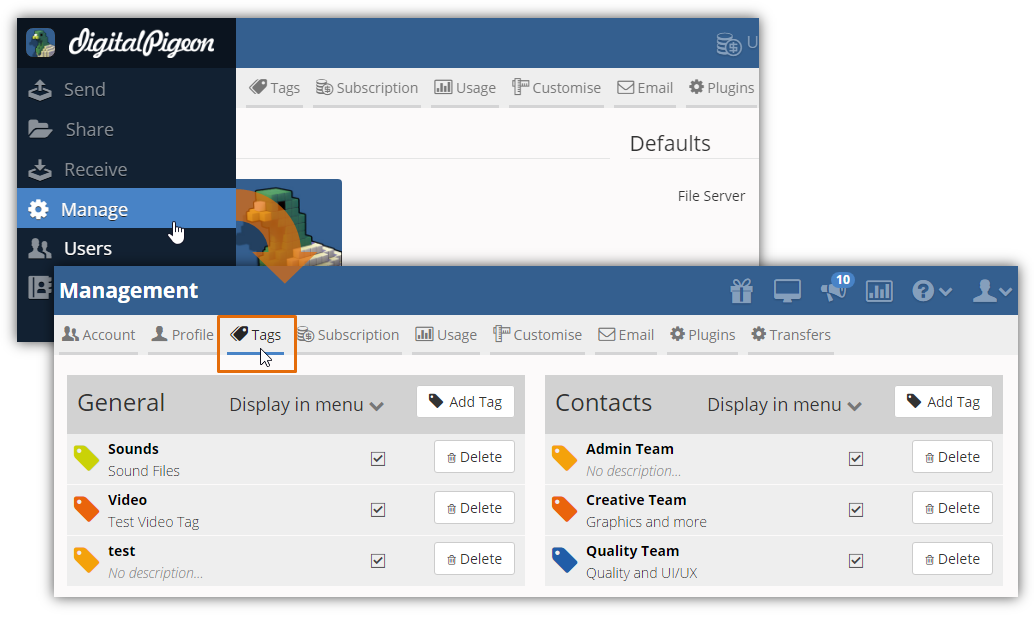
Create new tags using the Manage feature. On the Sidebar menu, click Manage wherein you will be directed to the Management page. In this page, find and click the Tags tab to open.
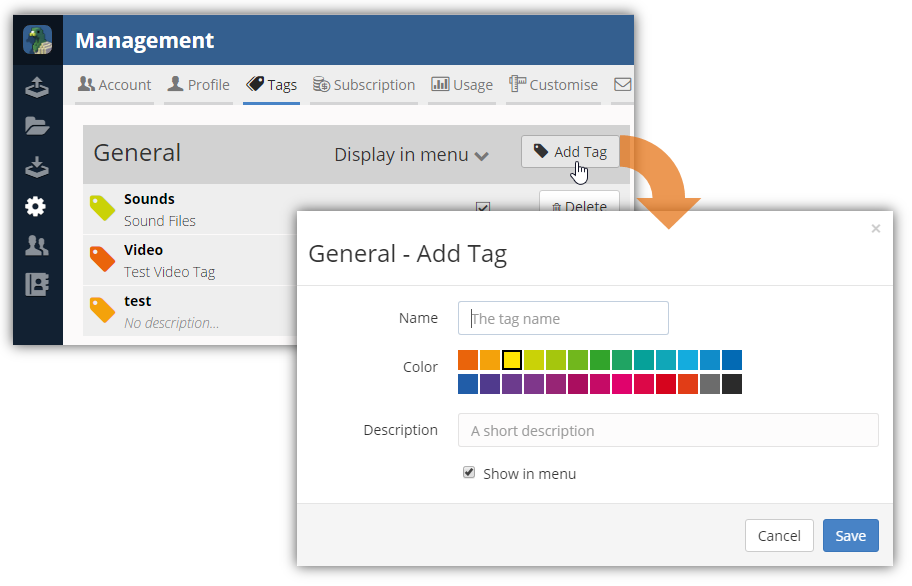
For general uploads, find and click the General section's Add Tag button.
This will activate the General - Add Tag window where you can specify the tag's details:
- Name: enter the tag name/label
- Color: select the tag's color
- Description: enter a brief description of the tag
- Show in menu: when enabled, the tag will appear in the Sidebar menu's Send, Share and Receive features.

After specifying the details, click Save to create the new tag.
Edit Tag Names, Color or Description
Updating tags enable you to change its name, color and description allowing you to maximise its usability. To update existing tags, open the Manage feature on the Sidebar menu and click the Tags to begin.
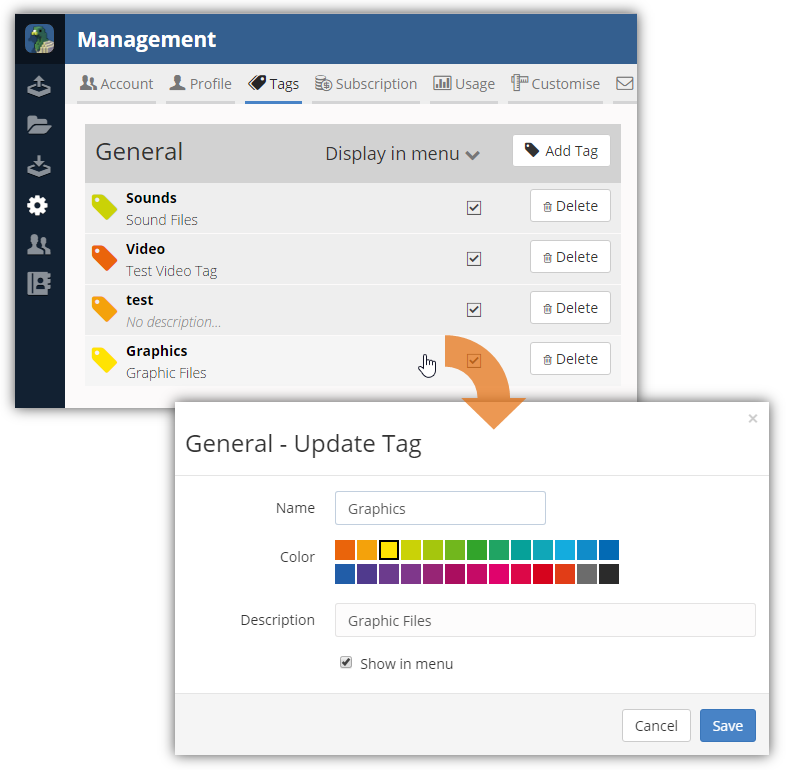
Find the General section and select the tag that you want to update from the list. You can click on the Tag Name to open the General - Update Tag window.
In this window, you can change the existing values of the following fields:
- Name
- Color
- Description
- Show in menu

Ensure to review the changes before saving the updated tag. If you are done updating the selected tag, click Save to apply the changes.
Delete Upload Tags
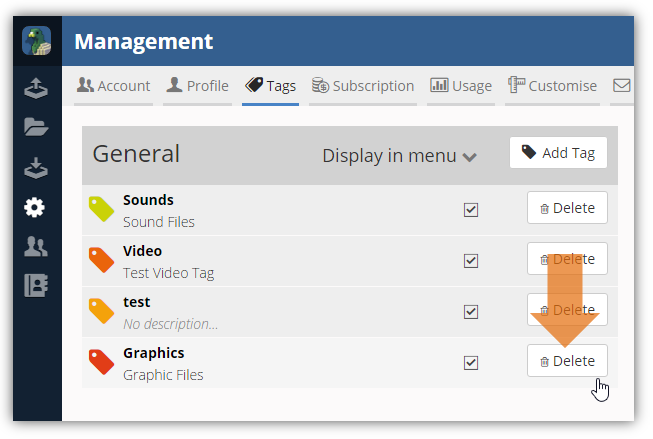
On the Sidebar menu, click Manage and select the Tags tab.
Once you are in the Tags tab, find the General section and the tag that you want to delete. Click the Delete button on the right in line with the tag that you want to remove.
Note: clicking the Delete button will instantly remove the tag without any confirmation. If you do not want to display a tag in the menu but keep it in the General section, you can deselect the tag's Display in menu checkbox.

Comments
0 comments
Please sign in to leave a comment.